

Bathroom Renovation Ideas: 2026 Guide for Durham Homes
Bathroom Renovation Ideas: 2026 Guide for Durham Homes
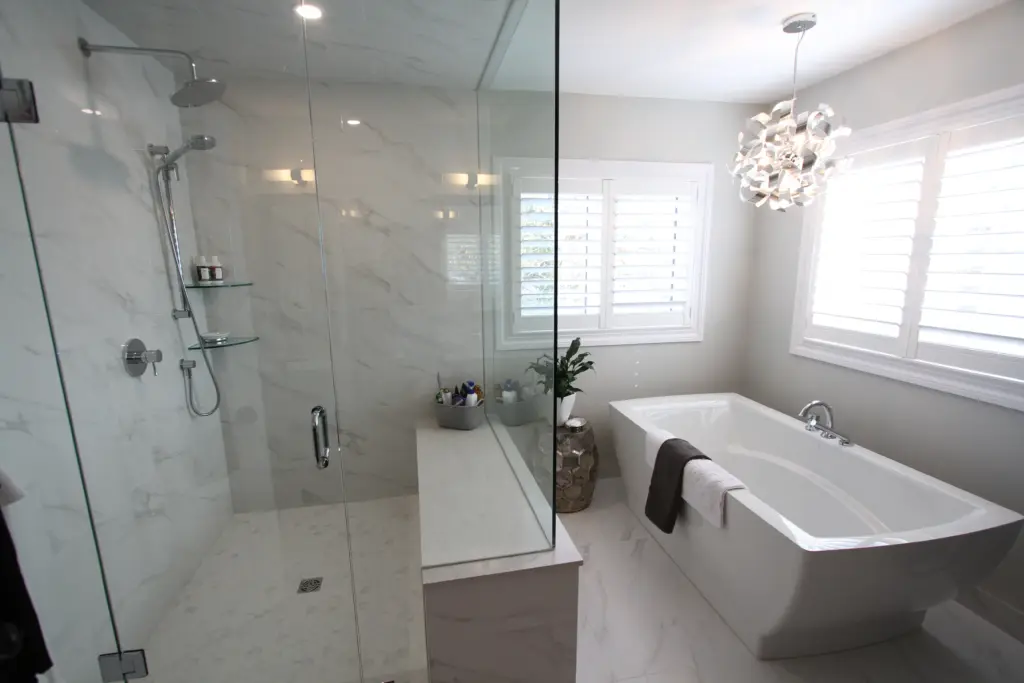
Table of Contents
- Bathroom Renovation Ideas That Maximize Space and Value
- Small Bathroom Layout Ideas That Work in Compact Spaces
- Is Installing Heated Floors in a Master Bathroom Worth It?
- Bathroom Renovation Cost Breakdown: Where Your Budget Goes
- Lighting, Tile, and Fixtures: Choosing Durable Finishes
- Accessibility and Universal Design in Bathroom Renovation
- Sustainable Bathroom Renovation Ideas That Cut Long-Term Costs
- Planning Your Renovation Timeline and Avoiding Common Mistakes
- Frequently Asked Questions
Last Updated: October 3, 2026
Bathroom Renovation Ideas That Maximize Space and Value
Bathroom renovation ideas work best when they solve two problems at once: how the room functions day to day, and how much it adds to your home’s value. The projects that pay off focus on layout, light, and durable finishes, not trendy add-ons.
A bathroom remodel is the process of updating a bathroom’s layout, fixtures, surfaces, and storage to improve how it works and how it looks. It ranges from a simple fixture swap to a full rebuild with moved plumbing.
Here’s what most guides get wrong: they lead with photos, not planning. The Canada Mortgage and Housing Corporation’s renovation guidance is clear that a solid plan and budget come before demolition, not after.
Below, we break down the ideas that actually work in real homes, plus what each one costs you in time and money.
Small Bathroom Layout Ideas That Work in Compact Spaces
Small bathroom layout ideas succeed when they free up floor space and use the walls. In a compact room, every centimetre counts, so we plan storage vertically and keep the floor clear.
Wet Room Conversions and Curbless Showers
A wet room removes the shower tray lip so water drains across a sloped floor. This makes a small room feel bigger and easier to clean. It also needs proper waterproofing and a floor drain, so it is a job for a licensed contractor, not a weekend project.
Floating Vanities and Recessed Storage
Floating vanities open up the floor and make a tight room feel wider. Recessed storage between wall studs adds shelf space without stealing an inch of floor. Pair both with a wall-hung toilet to free up even more room.
- Wall-mounted vanity: opens floor space
- Recessed niche: adds storage with zero footprint
- Corner shelving: uses dead space
- Tall cabinet: stacks storage upward
Measure your door swing before you buy anything. A vanity that blocks the door is a common mistake on small bathroom jobs.
Is Installing Heated Floors in a Master Bathroom Worth It?
Heated floors are worth it in a master bathroom if you use the room daily and hate cold tile in winter. The cost sits in the middle of a typical budget, and the comfort gain is immediate. For a rarely used guest bath, skip it.
There are two main types: electric mats and hydronic (hot water) systems. Electric mats suit small rooms and retrofits. Hydronic systems cost more upfront but run cheaper over a large floor area.
Here’s the trade off most people miss: heated floors add to your electrical load and need a dedicated circuit. Factor that into your plan early, or you’ll be redoing wiring later.
- Best for daily use master baths
- Electric mats: simpler, cheaper to install
- Hydronic: better for large floors
- Needs a dedicated circuit and thermostat
Bathroom Renovation Cost Breakdown: Where Your Budget Goes
A bathroom renovation cost breakdown usually splits into four buckets: labour, materials, fixtures, and permits. Labour and materials take the biggest share. Fixtures and finishes scale with your choices, so this is where you control the total.
Because pricing depends on room size, layout changes, and the finishes you pick, we quote every project individually. You can request current pricing from Classic Kitchens once we’ve seen your space.
| Budget Area | What It Covers | Where You Control It |
|---|---|---|
| Labour | Tiling, plumbing, electrical | Scope and layout changes |
| Materials | Tile, drywall, waterproofing | Finish tier |
| Fixtures | Vanity, toilet, shower, taps | Brand and style |
| Permits | Inspections, approvals | Whether you move plumbing |
How the Four Buckets Actually Scale
A cosmetic refresh, new fixtures, paint, and a vanity swap in the same location, keeps plumbing and electrical untouched, so labour stays low and permits are often unnecessary. A mid-range remodel that replaces the tub with a walk in shower and moves the drain adds plumbing labour, waterproofing, and a permit. A full rebuild that relocates the toilet, adds a circuit for heated floors, or removes a wall pushes every bucket up at once.
Labour and materials together dominate the total, fixtures are the most elastic line, and permits are a small line item that becomes expensive only when you skip them. A contingency of roughly 10-20% of the project total is a common buffer for what’s behind the walls.
Permits, Inspections, and Hidden Costs
Permits are required when you move plumbing, add electrical circuits, or change structural walls. Work like this must meet the Ontario Building Code, and electrical work typically needs an electrical permit from the Electrical Safety Authority (ESA). Plumbing changes usually require a building permit from your local municipality, and structural changes need drawings reviewed by a qualified designer or engineer before approval. Skipping permits can stall a home sale and force you to undo work.
Hidden costs hide behind the walls: rotted subfloor, old wiring, or a surprise load-bearing wall. A contingency is a common buffer for what’s behind the walls.
Removing a loadbearing wall without an engineer’s approval can crack your ceiling and fail inspection. Always confirm structural work with a qualified professional first.
Where to Save and Where Not To
Save on: paint, tile in low traffic areas, and decorative hardware. Don’t save on: waterproofing, ventilation, plumbing rough in, or electrical work. Those are the items that fail behind a finished wall and cost the most to redo.
Lighting, Tile, and Fixtures: Choosing Durable Finishes
Durable finishes come down to three choices: lighting, tile, and fixtures. Get these right and the room looks good for years. Get them wrong and you’ll be replacing them in three.
Lighting: Layer It, Then Control It
A single ceiling fixture flattens a bathroom. Layer three sources instead: ambient (ceiling or pot lights), task (sconces or a light bar at the mirror), and accent (an LED mirror or niche strip). Put task lighting on both sides of the mirror at face height, a single overhead light casts shadows on your face, which is a common lighting complaint.
Get your project Started Today →

For damp locations, fixtures must be rated for wet or damp areas, and any fixture inside the shower zone needs a proper rating. Smart switches and dimmers let you set a bright morning scene and a low night scene without rewiring.
Tile: Match the Material to the Wet Zone
Tile durability comes down to two specs: water absorption and wear rating. Porcelain has a lower water absorption rate than ceramic, which is why it holds up better in showers and on floors. For floor tile, look for a slip resistant rating, matte and textured finishes grip better than polished when wet. For walls, ceramic is fine and often cheaper.
Behind every tile in a wet area sits a waterproof membrane. The tile is the visible layer; the membrane is what actually stops water. Skipping it is the single most expensive shortcut in a bathroom.
- Floor: slip resistant porcelain, matte or textured
- Walls: ceramic or porcelain, any finish
- Shower: waterproof membrane behind tile, no exceptions
- Grout: epoxy grout resists staining better than cement-based
Fixtures: Metal Quality Beats Style
Fixture durability is about the metal underneath the finish. Solid brass and quality metal bodies outlast plastic and zinc alloy, especially at the tap and shower valve where pressure and heat cycle daily. A ceramic cartridge in the tap lasts longer than a rubber washer. For the toilet, a comfort height model with a smooth glaze bowl is easier to clean and easier to use.
The Eco Angle Most Guides Skip
Durable and eco-friendly overlap more than people think. A low flow toilet, aerated taps, and a low flow showerhead cut water use without a noticeable drop in comfort, and they reduce load on your hot water tank. LED lighting throughout cuts electricity and lasts years longer than halogen. Choosing recycled or locally sourced tile reduces transport emissions, and a properly sized exhaust fan, vented to the outside, not into the attic, pulls moisture out and stops mold before it starts. Durable finishes that last longer also mean less waste over the life of the home, which is the quietest green choice of all.
Material selection matters more than colour trends. A neutral palette ages better and resells better.
Accessibility and Universal Design in Bathroom Renovation
Accessibility features make a bathroom safer for everyone, not just people with mobility needs. Universal design means building the room so it works now and later, without a second renovation.
Key moves we recommend:
- Curbless shower entry, no step to trip on
- Grab bars in the shower and by the toilet
- Comfort height toilet
- Lever taps instead of twist handles
- Non slip flooring throughout
These add little to the budget if you plan them upfront. Adding them later means tearing out finished work.
Sustainable Bathroom Renovation Ideas That Cut Long-Term Costs
Green choices cut your bills and your waste. Water efficiency is the easiest win. Low flow toilets, aerated taps, and low flow showerheads cut water use without a noticeable drop in comfort.
- Low flow toilet and showerhead
- LED lighting throughout
- Recycled or locally sourced tile
- Proper ventilation to stop mold
- Durable finishes that last longer
Good ventilation also protects your investment. A properly sized exhaust fan pulls moisture out and stops mold before it starts.
Planning Your Renovation Timeline and Avoiding Common Mistakes
A typical bathroom renovation runs several weeks from demo to final walkthrough, depending on scope and permit timing. Phasing the work keeps your home livable.
Common mistakes we see:
- Skipping permits to save time
- Choosing tile before checking the layout
- No contingency for hidden damage
- Buying fixtures before measuring
- Forgetting ventilation and waterproofing
A clear timeline and a designer who helps you choose finishes removes most of the stress.
Planning a bathroom renovation can feel overwhelming, especially when you’re juggling work and a home full of decisions. Classic Kitchens takes the whole project off your plate, from design to installation. We offer full design services with designers on staff to help you choose materials and finishes that work together. We also handle structural load-bearing wall removals when you want to open up your space. Get started with Classic Kitchens and turn your bathroom into a room you actually enjoy.
Frequently Asked Questions
What is a realistic budget for a bathroom renovation?
A bathroom renovation budget depends on size, scope, and material choices. A powder room refresh costs far less than a full master bath overhaul with layout changes. Major cost drivers include plumbing relocation, tile work, vanity cabinetry, and labour. Always keep a contingency of 15 to 20 percent for hidden issues behind walls. For current pricing, request a detailed quote from a renovation company that provides a line item breakdown.
What should I avoid when renovating a bathroom?
Avoid skipping proper ventilation, as poor airflow leads to mould and premature finish failure. Do not choose porous or non water resistant materials for wet zones. Avoid moving plumbing fixtures without checking structural and code requirements. Do not overlook storage during the design phase, because adding it later costs more. Finally, avoid hiring a contractor without confirming they can handle permits and inspections in your municipality.
How do I choose the right materials for a moisture-prone bathroom?
Use porcelain or ceramic tile for floors and walls because they resist water absorption. Choose a vanity cabinet made from marine-grade plywood or moisture resistant MDF. For shower walls, large format tile reduces grout lines and makes cleaning easier. Ensure all materials meet local building code requirements for wet areas. A designer can help you match durable finishes with a cohesive color palette so the result looks intentional.
What structural considerations are needed when expanding a bathroom?
Expanding a bathroom often means removing a wall, and if that wall is loadbearing, you need a structural engineer to design a beam or header. This work requires a building permit and inspection. Plumbing and ventilation must also be rerouted to meet code. A renovation company with in house design and structural expertise can assess feasibility, handle engineering, and manage the permit process from start to finish.